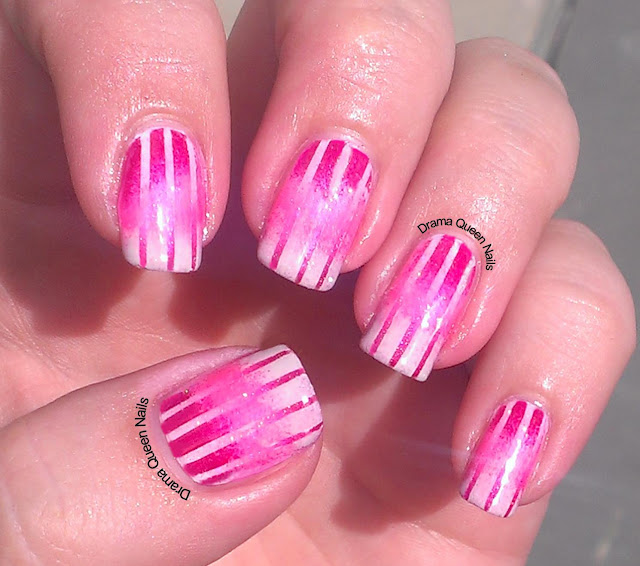
So I decided to jump on the #bestietwinnails bandwagon. This tag is currently doing the rounds on Instagram and I think its a fab idea. Get together with your bestie and have matching manis. I'm lucky enough to run DQN with my bestie and she is always kind enough to let me experiment and try out new techniques on her....the reverse gradient.
Read on for a tutorial for how to do this design.
Julsie's pink reverse gradient.
My St Paddy's Day version.
Now on to the tutorial. Here is what you will need to complete this design.
- Base and Top coat
- white nail polish - Barry M White
- 3 colours from the same hue family. I chose OPI - Skull and Glossbones, Zoya - Bevan and Barry M Gelly - Watermelon
- Striping tape and scissors
- A makeup sponge, or other sponge but I find this kind of sponge is easy to hold and the perfect size and shape for using on nails.
Step 1: Prep your nails with one coat of white polish. This helps to make the colours vibrant and if you are using a sheer polish is vital for ensuring your mani isn't see through. It doesn't need to be perfect, its about to be covered in 4 layers of polish.
HANDY HINT: Leave a bigger than normal gap between your polish and cuticle. When you are cleaning up you will need to use a small brush to wipe away polish near your cuticle. You don't want the white polish to start showing through, leaving a big gap makes this a lot easier to achieve.
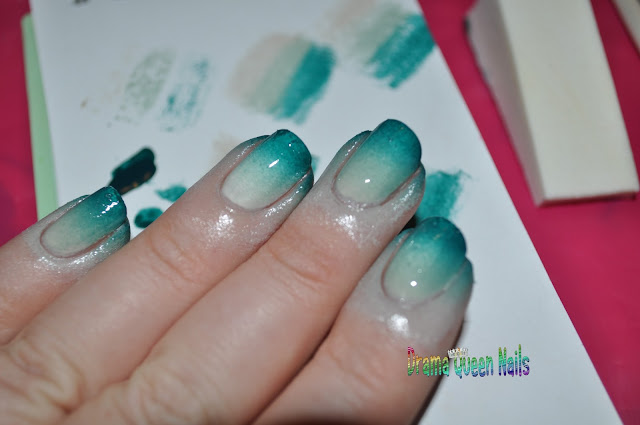
Step 2: Paint 3 layers of your chosen colours onto the sponge. Make the first few strokes really heavy on with the polish to get the sponge primed. Overlap each layer to the colour above and below it to blend the colours. You could use this technique also for a much cleaner blend but it will take a really long time to get through this design. Because there is so many layers to this mani, painting it onto the sponge may give you a "liney" look, but when it's finished there is so much going on that you cant really notice it.
Step 3: Dab the sponge onto paper to remove excess polish before applying to the nail. Apply to the nail dabbing in one direction, from the tip towards the cuticle.
Step 4: Messy! You could apply sticky tape on your skin around the nail to avoid this mess and make clean up easier but I feel awkward with tape on me and its hard to handle the striping tape in the next step. Make sure you cannot see any of the white base you applied, get the sponge down into the nooks and crannies. IMPORTANT: Add a layer of quick dry topcoat now. If you don't do this the striping tape will mess up your design. Wait a good 10 minutes before moving on.
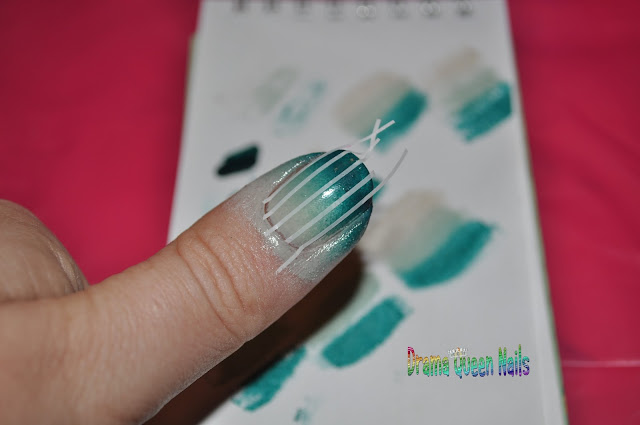
Step 5: Cut up your striping tape. You will need 17 pieces for each hand. Manipulate your striping tape with tweezers, it makes it so much easier than trying to use your fingers.
Step 6: Apply 3 pieces of tape to each nail, spaced evenly apart. Use 5 pieces for your thumb.
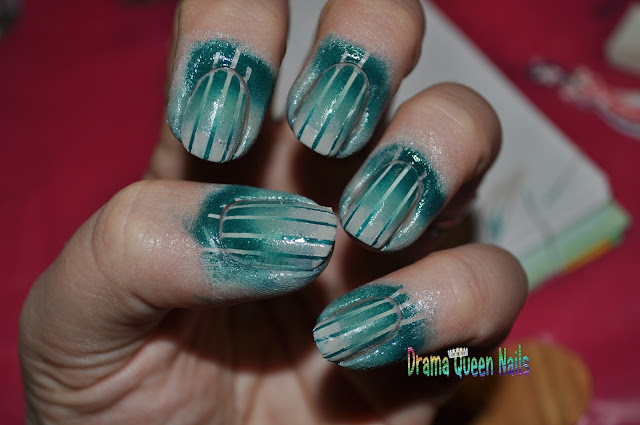
Step 7: Repeat step 2 except reverse the order of the colours on your sponge. Repeat step 3. HANDY HINT: After sponging the polish onto the nail remove the striping tape before moving on to the next finger. Removing tape whilst the polish is still wet will give you cleaner lines. I didn't do it here because I wanted to show you what this step looks like in full.
Step 8: Remove all the striping tape and get ready to clean up. I started clean up with cotton buds to remove the bulk of the polish on my skin. Then I moved to using my clean up brush. Apply topcoat again and you are done.


No comments:
Post a Comment